02 Jan 2020
Building a mobile application is hard. Building a beautiful mobile application is even more difficult. As a mobile developer without strong design skills, building a good-looking application for people to use directly from the app store is quite a challenge.
On-top of design, the typical price for a mobile app can vary depending on the quality of the app you want and the platforms you need to support. I typically believe that a mobile app is much like a car purchase, you can get a reliable app typically starting at $25,000, however if you want that high-quality, turbo-charged Ferrari app, you’ll be looking to create a platform starting around $100,000 or more.
Why does it cost so much though? There’s a lot that goes into making an app and supporting a small team through it all.
Based on an estimate on howmuchtomakeanapp.com, my application “Lawn Care Timeline” would cost $69,300 straight from my pocket to create. Maybe it’s just me, but I don’t exactly have $70k to spend on a side application when I can do a good majority of the labor with my background in mobile development.
However, with time being the limiting factor for me, I looked outside of my abilities to find experts who specialize in UI/UX and have familiarity of a consistent implementation across mobile platforms.
After doing research about how I would go about creating a consistent and beautiful cross-platform mobile application, I found GrialKit which is a Xamarin.Forms UI Kit that offers stunningly beautiful XAML templates & controls. Needless to say, after checking out their samples and features, I found the “Holy Grial” of UI kits for Xamarin.Forms.
In addition to providing a beautiful UI Kit, I learned that UXDivers(The creators of GrialKit) also offer mobile application UI design services in which they will jump-start your application’s design and provide you with a XAML implementation at the end of the 3 sprint process! Naturally, I got in touch with Pablo over at UXDivers to see if they’d help me design my application.
Enter GrialKit and UXDivers
After jumping on a call with UXDivers, it was obvious that they know how to create the most optimal UI/UX to ensure your users have an intuitive experience with your mobile application. Not only do they combine a majority of their UI/UX decisions with years of mobile design expertise, but they also have a breadth of knowledge for both the Android and iOS design systems to create a cohesive experience across platforms.
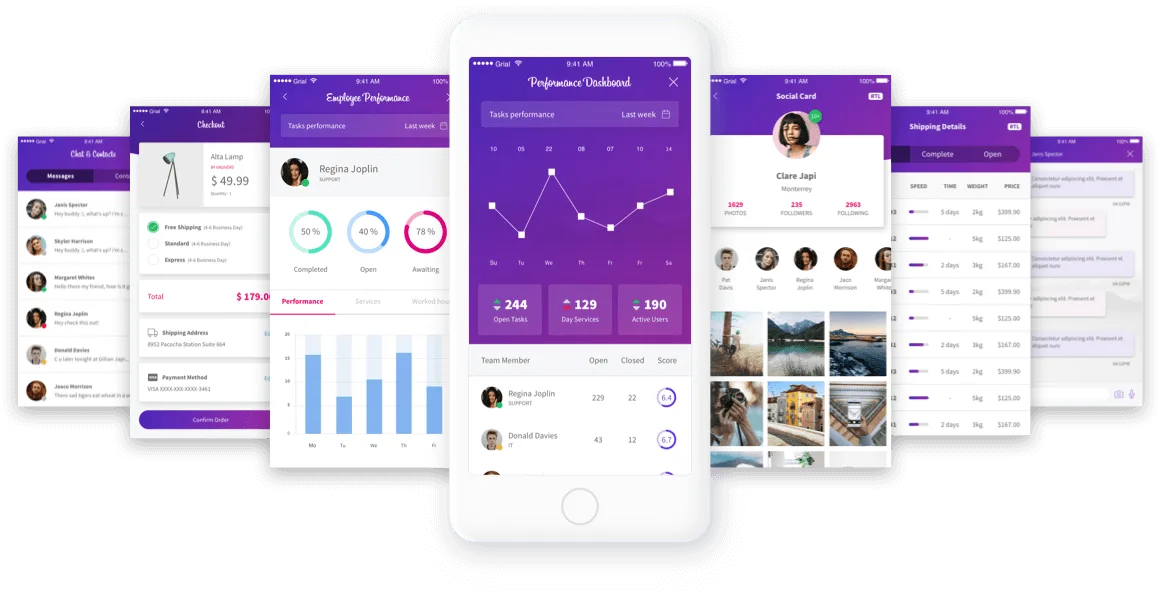
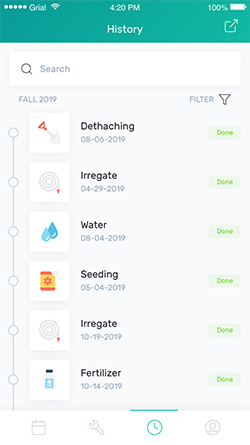
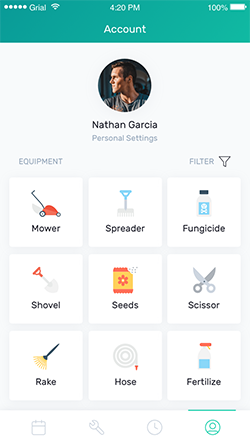
Pablo and his team over at UXDivers took on this project with open arms to help deliver high-fidelity user interfaces for an application that is designed based on what users needed in a DIY lawn care app. I was quite impressed with the high quality and agility the team were able to deliver the final result. The design & development craftsmanship was beyond my expectations. I mean, take a look at some of the final screens they created based off some initial mockups:

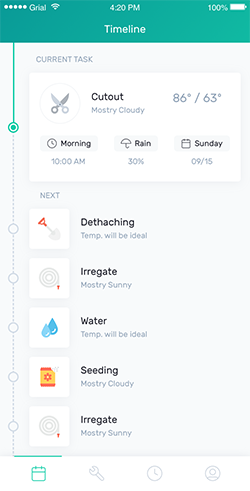
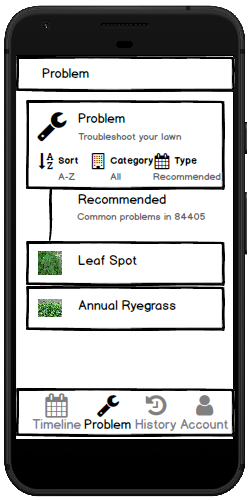

The final result exceeded my expectations. As a mobile developer who has a decent sense for design, not only did they take into account everything I wanted this application to look and feel like, but they continued to iterate until it was done right. I’d like to talk about how they took my concepts and made them a reality through a three sprint process.
The First Week (Sprint #1)
In the first sprint, UXDivers designs the visual identity of your mobile app. This is accomplished by creating a subset of screens that set the visual style of the application such as the navigation, colors, fonts, icons, images and overall the visual language used in the application.
Needless to say, the first week was quite empowering. The team took on the application with only a few details provided to them.
First, the team needed to know what the application will do. This gives them the best understanding for how to best design the application. Providing the team with information such as the mission behind the app, the high-level features, and mockups provided them the context to bring amazing coloring and details to the application.

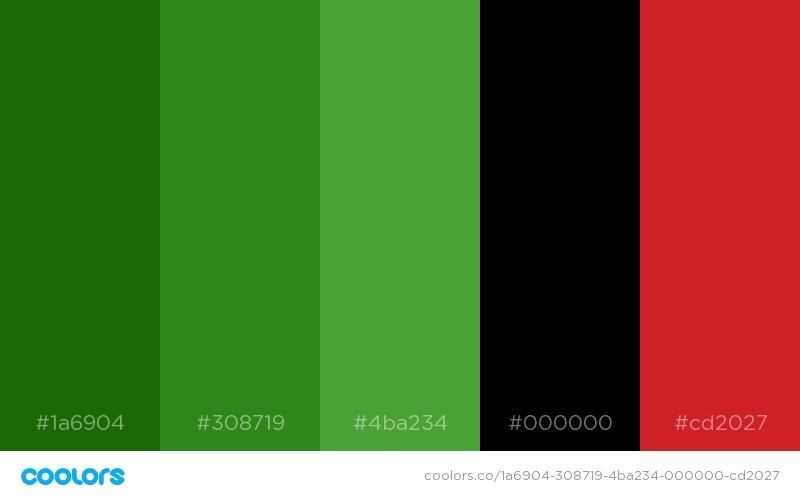
Next, the team wanted to know of a general theme that I had in mind for the lawn care application. For me, it was primarily green colors to represent grass with a bold red to represent a lawn mower. This helped provide them a palette to start from and refine of which I wanted to see in the app.
Finally, the last thing we discussed was the mood of the application. In other words, how do users want to feel when using the application? Do they want to feel empowered to tackle lawn care? Do they want to feel ecstatic that they found an application to help out one of their most hated chores around the house? The team helped provide a mellow and energetic mood to the overall app.
The Second Week (Sprint #2)
Next, UXDivers then applied the style from the previous sprint to every single page and created the application’s workflows within InVision.
We moved into high-fidelity mockups with design as the forefront of the decisions being made to the application’s flow. This is where majority of the UI started to come together with a consistent minimalist vibe across every screen with lovely icons to add a bit of playfulness to the app.
The Third Week (Sprint #3)
Finally, UXDivers took everything previously created from the first two weeks and implemented these designs into a clean, beautiful, developer-friendly Xamarin.Forms XAML that any developer can take and run with.
The team delivered a complete Xamarin.Forms project with each XAML file so it could easily be hooked up to our ViewModels and backend to get into our user’s hands as soon as possible.
With best practices in-mind, UXDivers provided well-formed XAML that you would be mistaken that a human wrote it. Not only did it help provide me with the context of using the best controls and patterns for each screen, but it also set the tone for how each respective ViewModel should be hooked up given they also include real bindings that have sample data representing each screen.
Summary
UXDivers did an amazing job throughout their three sprint long process to provide my side project with legs to deliver to market on time for our launch in Spring 2020. For developers who want to focus more on development and let professionals handle the design side, the UXDivers team delivers beautiful designs for your Xamarin.Forms application by providing your with every page, template, resource directory, font, and image you’ll need to deliver your app to the market.
If you’re not familiar with UXDivers, you can find out more about their services and check out their fully customizable products.
It was a pleasure to work with Pablo, Mauricio, and all the other fine folks over at UXDivers.
11 Jun 2019
User-Centered Design
We have one main goal when creating mobile apps, and that is to create apps that don’t need to be explained. But how do we create apps that do not need to be explained? Let’s break this down a bit further.
Usability is the degree to which an app is easy and efficient to use. A user interface is like a joke, if you have to explain it, it’s not that good. User-Centered Design is a process in which the needs, wants, and limitations of end users of a product are given extensive attention at each stage of the design process. This approach uses real people rather than an ideal user. We continue to iterate with these users over the course of an app design.
With User-Centered Design, we have the following goals in mind:
- Empathize with the user - Get to know your users at the beginning of the design process and come to understand their needs and context.
- Explore alternatives through rapid prototyping - Try out lots of ideas, the perfect design is likely to arise from throwing a bunch of ideas at the wall instead of crafting the perfect idea.
- Get feedback early and often - Get prototypes in the hands of users and always be incorporating user feedback. Seeing designs through the eyes of users clarifies what details are most important. Users will often point out issues you hadn’t thought of or highlight ideas you haven’t prioritized.
- Iterate to get to the best solution In order to always be incorporating feedback, you must iterate constantly, don’t get attached to any one design and be open to changing your assumptions.
We can accomplish these goals by following an iterative process of trial and error.
User Needs and Context
The first step to User-Centered Design is to understand our user’s needs and context. We want to empathize with the user and get to know our users on a deeper, more personal level than just an “ideal user” for our app. We want to study their habits, behaviors, and understand their pain points.
To do this, we can conduct some user research using techniques such as:
- Surveys - Large sample size
- Random Intercept - Asking random strangers questions regarding your product.
- Interviews - Interviews allow you to dive deeper to user needs and goals. Provides a natural conversation
- Focus Groups - Group of people in a room to discuss a product and brainstorm
- Contextual Inquiry - View people in the natural habit of using a product to research.
- Ethnographic Study - Studying people in their everyday environment
- Diary Study - Provides insight to user behavior.
Prototyping
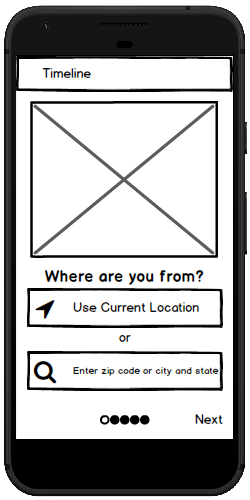
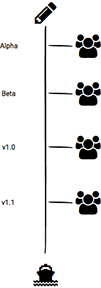
The second step to User-Centered Design is to rapidly prototype our ideas to low fidelity sketches. This helps get the ideas from our head onto paper. It then allows us spread these ideas into the real world, in front of real people, as fast as possible. We want to explore alternatives through rapid prototyping to ensure our ideas are not what we think is best for the user, but rather ideas that come from a validated source.
When we are prototyping, we typically want to stay in low fidelity until we’ve iterated our ideas to the point of user validation. This helps us explore the possibilities for a high fidelity prototype in the future.
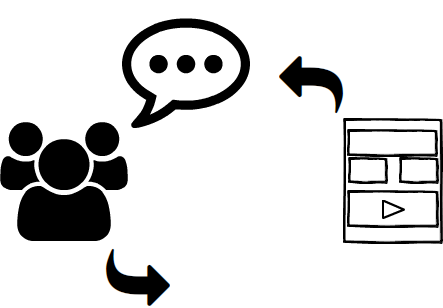
Feedback
The third step to User-Centered Design is to get feedback early and often. We want to get prototypes ni the hands of users and incorporate their feedback as soon as possible. When users see prototypes through their own eyes, it helps clarify the details that are most important to the app. Your users will typically point out issues that you would never have thought of in the first place, or highlight ideas that you weren’t sure how to prioritize based on their needs.
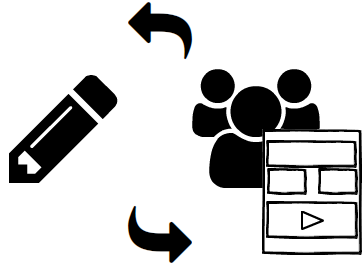
Iteration
The final step to User-Centered Design is to iterate to get to the best solution. In order to incorporate our user’s feedback, you need to iterate constantly. This helps us avoid getting attached to one design and allows us to be more open about changing our assumptions about the user and the app.
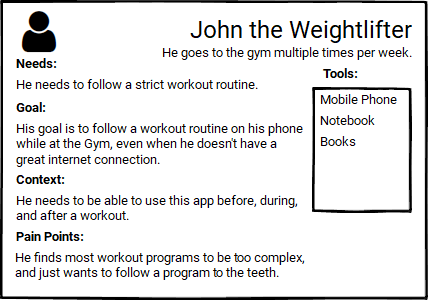
User Type
While iterating through these four steps, you will be able to start putting together a user type. A user type should have the following items in mind:
- Name - Give the user an identity.
- Photo - What would this user look like?
- Needs - What are the needs of this user?
- Goals - What goals does this user want to accomplish?
- Context - What is the context for this user?
- Pain Points - What are the pain points this user has currently?
- Tools - What tools does this user use currently?
Feel free to create a few different user types as there is no single user type that will cover every user. Each user has different needs, goals, and pain points to explore.
Use Cases
Now that you know “Who” your user is, you now need to think about “How” they might use the application.
You can now write down some use cases for this specific user type.
Low Fidelity
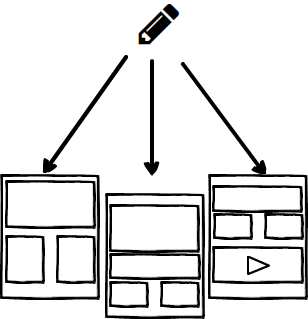
When we are creating our initial prototypes, we are exploring options for the application. We want to get our ideas from our head onto paper. These should be quick mock-ups that you can create in a few minutes. Don’t waste too much of your time with getting every detail right as it is very possible that you will iterate and change something down the road.
Tools:
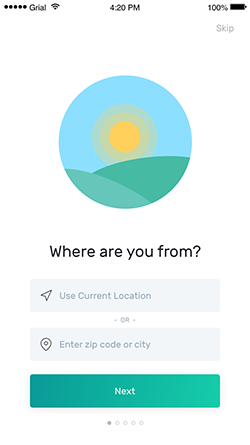
High Fidelity
When we are satisfied with our prototypes, we will want to move to a higher fidelity which might mimic what the actual application might look like once it’s implemented in code and available on the Google Play Store. Because we do not want to continuously perfect the details, we only want to be in high fidelity when we feel the prototype is ready.
Tools:
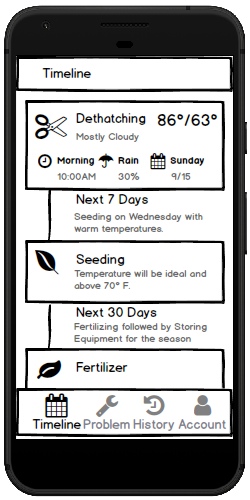
Creating an interactive prototype and displaying on device
To help provide the vision of the app to a user, we want to create an interactive prototype that we can wire up taps, gestures, etc to which the user can understand the overall premise of the app.
Tools:
Inspiration from others
One of the best resources to derive your prototypes from is other applications.
29 May 2019
What’s Next
I wanted to provide an update as to what’s next for this blog, and some of the developments I’ve been working on since. I know this blog has been awfully quiet since January of 2018, so here’s a quick update.
Personal Life
In March of 2018, my daughter Audrey was born. Transitioning to parenthood was a challenge in itself! I mean, how could you not love this face?

If there’s anything I learned about becoming a father, it’s that you need to make time as it’s not magically handed to you. Someday your life will change for the best, and you have to put things on the shelf for awhile until you’re ready to commit to them again.
Xamarin.Android Book
It’s been a little more than 2 years since I provided an update about the Xamarin.Android book. For about a year since February 2017, I dedicated myself to writing a book about Xamarin.Android. I wanted to provide an up-to-date resource for Xamarin developers regarding the Xamarin.Android SDK and Android Tooling that Xamarin provides. I wish somebody would’ve told me what I was getting into when I started.
Challenges
As with anything, there are some challenges I ran into while writing this book. Although I’ll save the details of the technical challenges of writing a book, I’ll let you read a few blog posts that describe how challenging it is, especially for a technical book.
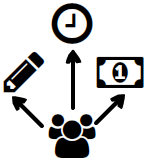
Let me just say this up-front. I approached writing a technical book for the wrong reasons, not the right ones by the time I decided it wasn’t worth it for me. I thought by writing this book and eventually publishing it, that I would see the fruit of my labors such as:
- Recognition
- Money
- Career Development
- Opportunities
While, when I first pursued it, I was actually doing it for the following reasons:
- Learning about the technology
- Bridging the gap of complexity for others
- Improving my network by increasing my audience
I’m not going to sugar coat it, this was the primary reason why I failed to stay motivated while writing this book. I was too obsessed with the result of writing this book rather than the actual process. After writing over 250 pages of technical content, I had only hit the tip of the iceberg of what I wanted this book to be. For example, I wrote on topics like user-centric design and how to validate your apps:
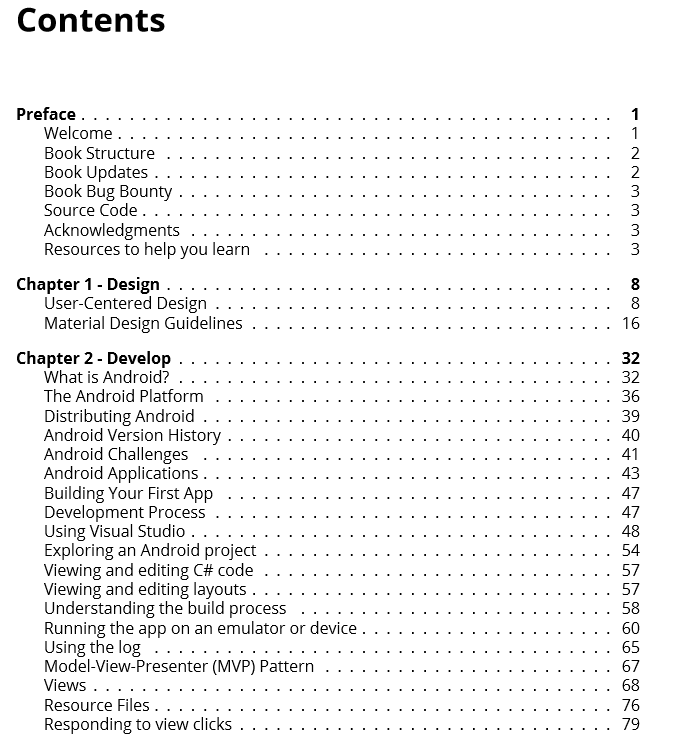
Looking back on this, I do not miss having to move pixels of images to be perfect, matching text size accordingly, and ensuring the right language is set for code snippets. The inner development loop for creating books is not great. Most of my time is focused on making things look good, rather than the actual writing itself.
I did not go into this with a publisher, I’ve heard too many horror stories and was recommended to try self-publishing for my first time. Boy was I wrong about that…
The true reality in self-publishing is that you need to wear even more hats. You have to be a:
- Designer
- Technical Writer
- Evangelist
- Marketer
- And much more
Now I don’t have much of a problem with this aspect. In fact it was quite challenging and fun to create my own graphics, write all of my own content, market the book, and so on.
What eventually got to me is being committed to too many things. I had to turn off more than 2 burners which made me feel isolated from my family, struggling with my physical/mental health, and not being there for my friends.
What’s Next
I want to give back to the community more than I have recently. And thus, I have two main journeys I’ve embarked on.
Giving away the Xamarin.Android Book for free.
Yes you heard it right. For everyone who signed up for the Xamarin.Android Book email list, and those who are reading this blog, I will be creating small blog segments on all the aspects of content I wrote for this book and releasing them on this blog. I will also be including new blog posts on mobile development content that I think you could benefit from.
jondouglas.dev
Throughout this process, I found my true passion is helping others become better developers, managers, and performers in general. I’ve started blogging on better habits, deep work, improved health, and software development. You can find my blog here:
https://jondouglas.dev/blog/
I’ve also started streaming on twitch, helping people get into the software industry by holding AMAs and exploring topics I think are neat.
https://www.twitch.tv/jondouglasdev
More blogs on mobile development
Although this blog is primarily Android focused, I want to start talking about other aspects that I think are beneficial for mobile developers as a whole. That involves product-market fit, customer development, user experience, application development, continuous delivery, and much more. I hope you’re just as excited as I am, especially to be repurposing a blog.
Summary
In the end, I learned many valuable lessons. I hope that my story inspires you today to put your wellbeing first, and ensure your priorities are aligned with your motivation. Think about why you do what you do, and make sure you enjoy the journey as well as the destination.
Thank you all for reading & support throughout the years.
03 Jan 2018
Android Emulator Quick Boot
Beginning with Android Emulator version 27.0.2, the Android Emulator now includes a feature called Quick Boot that launches the emulator in a few seconds.
For Quick Boot to work, your AVD must perform a cold boot on it’s first time booting up. All subsequent starts will use the Quick Boot feature which restores the system to the state it was last closed in.
This feature is turned on by default.
Getting Started
To get started, open up the Xamarin Android SDK Manager inside your IDE by going to Tools > Android > SDK Manager.

Under the Tools tab, update the following items:
- Android SDK Tools 26.1.1
- Android Emulator 27.0.2

Once you’ve installed the requirements for this feature, it’s as easy as booting up your favorite AVD for the first time to start the initial cold boot.

When you’re done using the AVD, you can exit out of the emulator and Quick Boot will save the state of your emulator.

The next time you open your AVD, it will load the existing state and proceed to Quick Boot.

Summary
Your emulator should now start up in under 6 seconds. Now there is no excuse to wait for the emulator to boot up and you can continue coding!
Xamarin.Android Book
If you enjoyed this post, please consider subscribing to my upcoming book’s email list:
You can signup at the following link: Programming Xamarin.Android Email List
22 Sep 2017
Preface
Ah, the mono linker. One of the greatest enemies of the Xamarin developer. Have no fear fellow Xamarin developers, the linker analyzer is here!
What is the Linker Analyzer?
The Linker Analyzer is a command line tool that analyzes dependencies which are recorded during the LinkAssemblies step. It will show you what items were marked and resulted in the linked assembly.
Getting Started
You can get started with the following command against your Xamarin.Android application:
msbuild /p:LinkerDumpDependencies=true /p:Configuration=Release YourAppProject.csproj
This will generate a linker-dependencies.xml.gz file which you can extract to view the linker-dependencies.xml file.
The linker-dependencies.xml file
The linker-dependencies.xml file is a xml that includes every item that was marked to keep in your application. You can open this file in an editor like Notepad++ for an overview.
Comparing linker-dependencies.xml files
Now one of the best tools in our toolkit is the ability to generate a linker-dependencies.xml file with each of the linker options enabled:
- Don’t Link (Small file)
- Link SDK Assemblies (Medium file)
- Link All Assemblies (Large file)
We can then use a comparison tool such as:
https://www.scootersoftware.com/download.php (Windows)
https://www.kaleidoscopeapp.com/ (Mac)
To compare between each linker option to see the behavior of what is being linked in our assembly. This is especially useful for optimizing our applications.
Analyzing types
You can also analyze types using the linkeranalyzer.exe tool that is shipped with Mono.
Note: You may want to put the following on your PATH:
C:\Program Files\Mono\lib\mono\4.5 (Windows)/Library/Frameworks/Mono.framework/Versions/{Version}/lib/mono/4.5 (Mac)
You can then use this tool to determine why a type was marked by the linker. For example if we wanted to see why our custom application was marked by the linker, we might first start with the parent type to see dependencies:
linkeranalyzer.exe -t Android.App.Application linker-dependencies.xml.gz
Output:
Loading dependency tree from: linker-dependencies.xml.gz

--- Type dependencies: 'Android.App.Application' --------------------

--- TypeDef:Android.App.Application dependencies --------------------
Dependency #1
        TypeDef:Android.App.Application
        | TypeDef:mayday.Droid.MaydayApplication [2 deps]
        | Assembly:mayday.Droid, Version=1.0.0.0, Culture=neutral, PublicKeyToken=null [1 deps]
        | Other:Mono.Linker.Steps.ResolveFromAssemblyStep
We can then see that mayday.Droid.MaydayApplication is our dependency as it is based on the Application type. Let’s analyze that type now:
linkeranalyzer.exe -t mayday.Droid.MaydayApplication linker-dependencies.xml.gz
Output:
Loading dependency tree from: linker-dependencies.xml.gz

--- Type dependencies: 'mayday.Droid.MaydayApplication' -------------

--- TypeDef:mayday.Droid.MaydayApplication dependencies -------------
Dependency #1
        TypeDef:mayday.Droid.MaydayApplication
        | Assembly:mayday.Droid, Version=1.0.0.0, Culture=neutral, PublicKeyToken=null [1 deps]
        | Other:Mono.Linker.Steps.ResolveFromAssemblyStep
Dependency #2
        TypeDef:mayday.Droid.MaydayApplication
        | TypeDef:mayday.Droid.MaydayApplication/<>c [2 deps]
        | TypeDef:mayday.Droid.MaydayApplication [2 deps]
        | Assembly:mayday.Droid, Version=1.0.0.0, Culture=neutral, PublicKeyToken=null [1 deps]
        | Other:Mono.Linker.Steps.ResolveFromAssemblyStep
Linker Statistics
You can also get the statistics of what’s linked in your assemblies.
linkeranalyzer.exe --stat --verbose linker-dependencies.xml.gz
Output:
Loading dependency tree from: linker-dependencies.xml.gz

--- Statistics ------------------------------------------------------
Vertex type:    Other           count:18
Vertex type:    Assembly        count:3
Vertex type:    TypeDef         count:4606
Vertex type:    Method          count:40101
Vertex type:    Field           count:25680
Vertex type:    ExportedType    count:1251
Vertex type:    MemberRef       count:7672
Vertex type:    Property        count:27
Vertex type:    Module          count:45

Total vertices: 79403

--- Root vertices ---------------------------------------------------
Other:Mono.Linker.Steps.ResolveFromAssemblyStep
Other:Mono.Linker.Steps.ResolveFromXmlStep
Other:Mono.Tuner.SubStepDispatcher
Other:MonoDroid.Tuner.MonoDroidMarkStep

Total root vertices: 4
Summary
This is only a surface level of how to use this tool to help diagnose linker issues in your application. This tool is extremely useful for seeing what is ultimately making your linked assemblies.
Huge shoutout to Radek Doulik(https://github.com/radekdoulik) for a wonderful tool and documentation!
Further documentation:
https://github.com/mono/mono/tree/master/mcs/tools/linker-analyzer
Xamarin.Android Book
If you enjoyed this post, please consider subscribing to my upcoming book’s email list:
You can signup at the following link: Programming Xamarin.Android Email List